Monday, September 8, 2014

Auntie Kym

It's hard to believe it's been the better part of a year since I last posted! I've sewn a few projects, though I took a long break after a poorly thought-out decision to make a gigantic scrappy beach quilt before I went on vacation in addition to sewing a beach bag from scratch. I didn't give myself enough time to enjoy the process of making either one, but I'm pleased with the way they came out. I just needed a breather after that!

But rewinding a few months to the spring, I made a quilt for my oldest friend Becky's new arrival, Michelle Elaine. (She takes her middle name from Becky's mom, who got me hooked on embroidery all those years ago!) I wanted to make something a bit girly, so it would be distinct from her brother Simon's quilt, but I'm not a big fan of pink. So, I based the color scheme around Patty Sloniger's Les Amis line and went with peach, cream, and green.


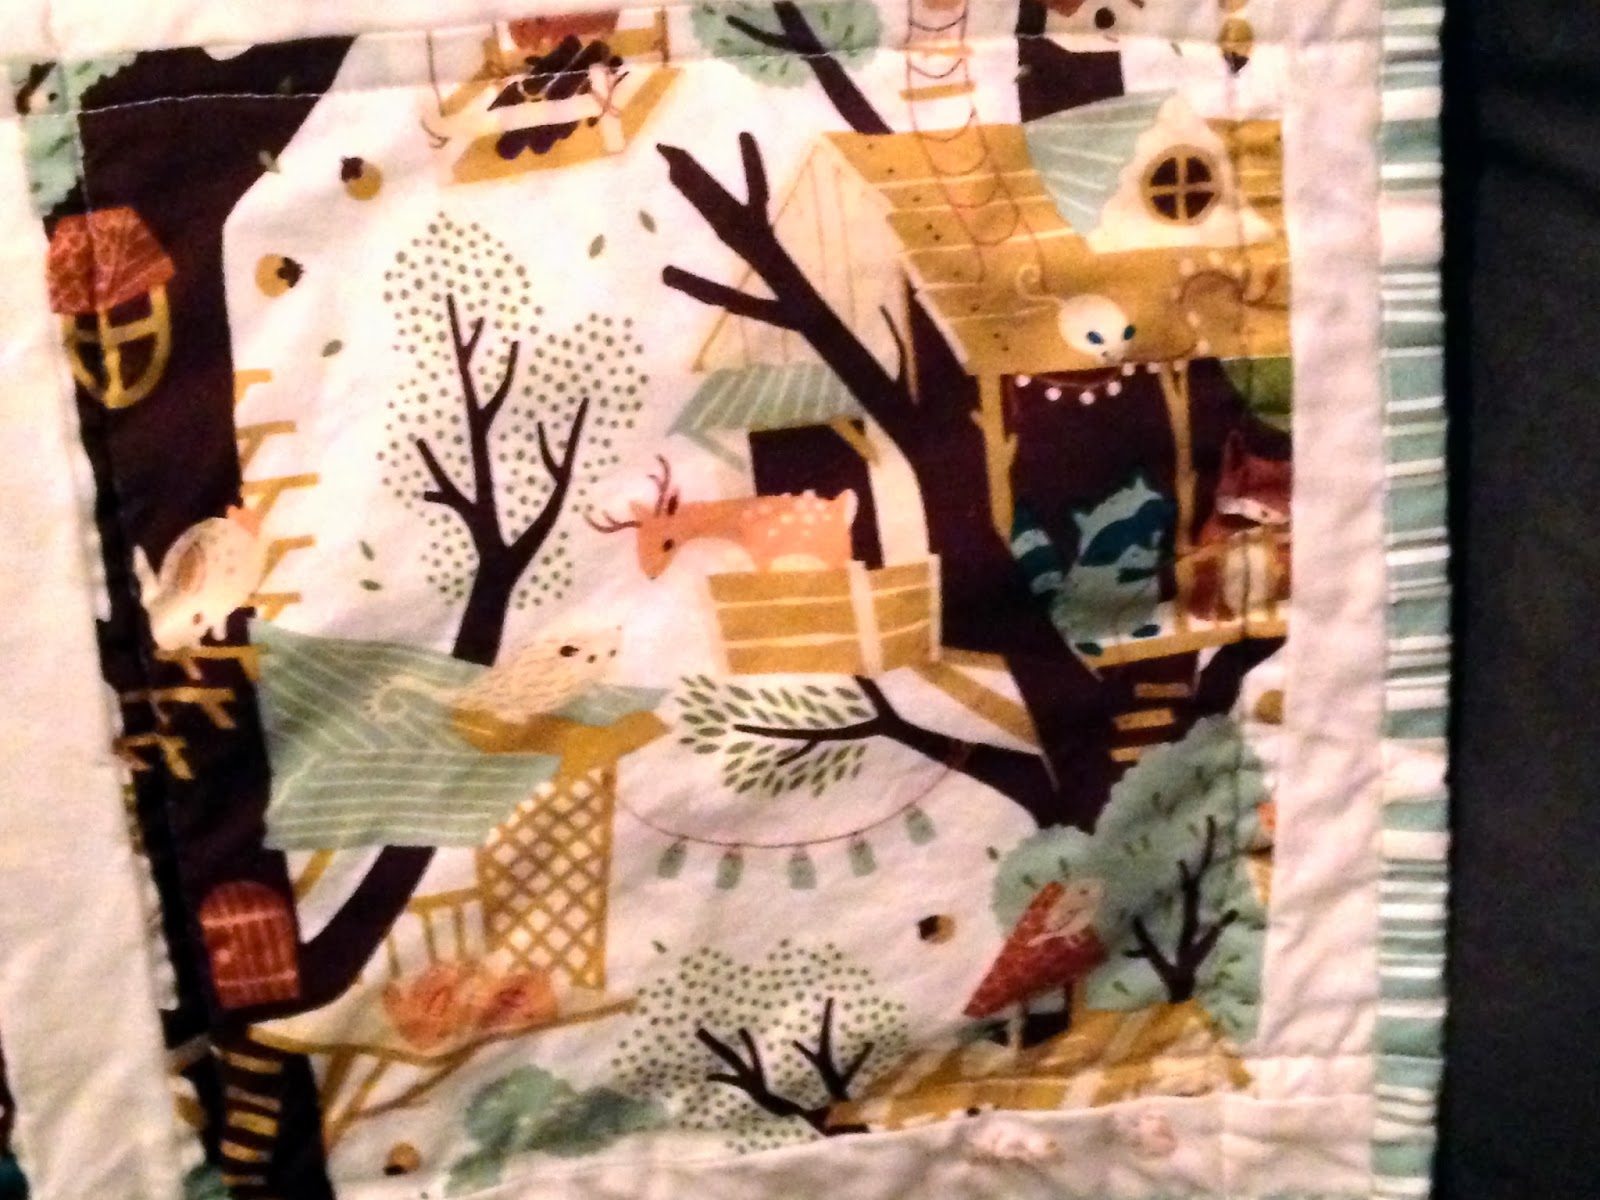
I tried my hand at pinwheel blocks for the first time, and I love the way they came out! I found some great tricks online for making a few pieces at once, which definitely came in handy. Since the prints in this line are so cute -- I love the woodland themes that are popular right now! -- I made big blocks for the front of the quilt.

The back is a 108" width fabric from Connecting Threads. It struck me as being too bright at first, but I grew to like the pop of color. I quilted in a grid pattern, roughly following the block pattern. And of course, I embroidered a message to Michelle.


I was lucky enough to get to hand deliver Michelle her quilt in May when I flew out to California for a long overdue visit with Becky and her family. It was wonderful! Becky's a great mom, and her kids are two of the sweetest, brightest kids I've ever met.

Simon, who is now two, calls the quilt I made him "Auntie Kym." His parents originally explained to him that his Auntie Kym had made the quilt for him, but in toddler logic, that meant the quilt must be called "Auntie Kym." He always asks for Auntie Kym when he goes to sleep (which caused some confusion when I was visiting!), but it's so nice to know that he loves his quilt. Sometimes you wonder if the quilts you've spent hours and hours working on get shoved into the back of the closet, or forgotten after the initial appeal wears off. I'm so glad that mine are being put to good use!

When I gave Michelle her quilt, Simon had to bring his out, too. :)


It's an Auntie Kym party!


I love those kids, but at the rate they are growing, it won't be long before they need bigger quilts!


Tuesday, February 11, 2014

My New Sewing Machine

My Brother LX-2500 has served me well over the past 2 1/2 years as I dipped my toe into the world of sewing and quilting, but the more I worked on it, the more I started to notice its flaws. The thread tension would sometimes change for no good reason, leaving me with trails of loose or tight stitches I would have to pull out and redo. There's not a lot of space to push a large quilt through. The presser foot stopped lifting as high as it should, so I'd have to hold it in place when I needed it in the "up" position. And finally, it was very, very loud. 

As a beginner's machine, I could not recommend it highly enough. It has everything you need without any frills, and for occasional sewing or mending, it would be perfect. But this past fall, I knew I wanted to step up to a better machine. So, come Christmas, I knew what I would be asking for.

I did quite a bit of research. All of the sewing bloggers I read use Janomes, Berninas, or Jukis, it seems. But those are expensive (in the $1000-2000 range), and they also have a different layout than what I'm used to. I don't sew every day, and sometimes I even let a few weeks go by without sewing, so spending more than a few hundred dollars on a machine seemed excessive -- even if it would be a gift! 

Since I had a good experience with Brother, I set my sights on one of their computerized models, the CS6000i. It has the same layout as my old machine, but much more space to work with. There's even a snap-on table that extends your workspace. The digital display is easy to use and there are 60-some stitches. (I've only tried a handful, so far.) The automatic needle-threader was a selling point for me. It also came with a cover and several feet. Best of all, I found it on sale on Amazon in the range of $150, so I keep reminding my dad that I saved him a bunch money on my Christmas gift.


(A bonus peek at my Liberty quilt in progress!)
So far, it's been great. The tension is much more consistent, and so is the stitch length. It runs the fabric through much more smoothly than it's predecessor. And it's quiet! 

My first project was a pillow for my college friend Ryan's new son, Arthur. I used some Michael Miller fabric I had on hand and I machine-appliqued an "A" on the front. It came together in just a couple of hours. I hope the little man likes it!
(Ignore the rogue thread...)


Then, I made an apron for myself with some of the Joel Dewberry's Bungalow fabric my mom got me for Christmas. I used an apron of my dad's as a template, then I pretty much winged it! I mentally split the apron into a top and bottom, then I arranged the fat quarters to fit the separate parts. I lined the top piece and the bottom piece to give it some weight. For each piece, I pinned reverse sides of the outer fabric and lining fabric together, stitched around three sides (leaving the bottom of the top and the top of the bottom open), then flipped the piece right-side out. As I attached the lining for the top, I also attached the neck strap (whose fabric is from the very first quilt I made!). I added a pocket to the bottom. Then I connected everything with the middle band, and topstitched around each of the fabric pieces to give it more of a finished look. 

I decided to extend the ties at the last minute and had run out of that fabric, so I improvised. I wasn't 100% pleased with the top, so I added the extra strip of fabric, which I think brings it all together. When you look at the back, you can see how piecemeal it is, but I figure it doesn't really matter, since it's just for me.


It's big -- the sides wrap around my back, so they're almost touching. However, I'm a messy cook, so that's probably a good thing. I'm very happy with it. I like how crazy it looks with so may fabrics and colors. Maybe it will make me want to cook more often! 

Next up: Laundry Bags, Take 2

Friday, January 3, 2014

A Bundle of Baby Quilts

Lately, it seems like everyone I know is having babies. It's been a fun time, but I've been busy trying to keep up with all of the baby quilts! Starting in August, I got to work on a quilt for the baby boy of my best friend Wendy. (You've heard me mention my best friend, Andrea. Well, Wendy is the other part of our best friend trio!) Wendy was due in late September, and I finished little Dawson's quilt soon after.

I used some animal prints from Ann Kelle's Urban Zoologie line as the focus (love those monkeys!), with royal blue and lime green fabrics mixed in. I wanted the quilt to be bold and fun, with plenty for the little guy to look at. I came up with the pattern myself: big squares alternating with groups of four smaller squares. The quilting lines shadow all of the smaller squares. The backing fabric is a tiny star print from Connecting Threads and I added an embroidered note. The quilt was a big hit with Dawson's parents and grandmoms, though Dawson has yet to indicate his preference either way.


The next quilt was for the child of my old high school friend Randy, who I also went to Lehigh with, and his wife, Marie. Little Anthony decided he wanted to emerge while his mom was matron of honor at her best friend's wedding. The kid knows how to make an entrance! Randy and Marie didn't reveal the gender of the baby ahead of time, but I knew they had chosen a forest theme for the nursery with greens, oranges, and other neutral colors. I fell in love with the Fort Firefly fabric line from Birch Organics. The animals are doing all sorts of cute things, but the muted color palette gives it a nice retro feel and doesn't make it seem too babyish.

I used Bijou Lovely's Colorblock Quilt pattern and it came together really quickly once I got going. (The directions were really easy to follow!) This quilt also marked the first time I used basting spray instead of pins to create my quilt sandwich. I was previously opposed to basting spray because it felt like cheating, but my goodness, it saves about 2 hours! I'm not sure how well it would work for larger quilts, but it was mighty useful for a crib-sized quilt. For the backing, I chose a Riley Blake chevron in brown & white, Lehigh's colors, for a fun little surprise. Since Anthony had already arrived by the time I started the quilt, I was able to embroider his name on the front.


The animals are setting up for a treehouse party! Squeee!


Last, but not least, my middle school pal, James, and his lovely wife, Autumn, had a baby girl, Emilia Rose, at the beginning of December. James and Autumn chose a camping/forest theme for the nursery in gender neutral blues and greens, since they didn't plan on revealing the baby's gender. So, I decided to use the Backyard Baby fabric collection by Patty Sloniger in the light blue colorway, which I thought would be appropriate for a boy or a girl. It features a bunch of animals, bugs, and natural elements. (No child of James and Autumn will be squeamish about bugs!) James raises honeybees so I was delighted to find some beehives in one of the patterns. For the backing, I used a precious turtle print from Patty's other line, Les Amis. It might be one of my all-time favorite prints.

I came up with the pattern myself: big blocks to feature the cute fabrics, separated by rows of white sashing. I only used horizontal quilting lines to shadow the rows. I once again used basting spray (seriously, such a lifesaver!). To make it a little more girly, I embroidered Emilia's first name and a rose for her middle name. Since I was in a time crunch -- I had plans to meet Emilia over the holidays and wanted to give her the quilt then -- I decided to sew on the binding with my machine for the first time. Though I like the look of a hand-sewn binding better, it takes forever and the machine-sewn binding does seem more durable. I think I'll have to work on my machine-binding skills (calling my stitching lines "squiggly" would be generous!), but I wouldn't be opposed to doing it again in the future since it cuts about 3 hours off my overall quilt-making time. The quilt was ready just in time for our visit!


Ants!

A bug zoo!


The cutest turtles ever!

Thus ends my quilt-making adventures for 2013! The next of my friends' babies isn't due until March, so I can take a little breather. However, I did receive an awesome new sewing machine for Christmas, so I've been working on some smaller projects that I will write about soon. Happy 2014!