Tuesday, September 8, 2015

So much embroidery!

In my enthusiasm for quilting over the past few years, embroidery started to fall by the wayside. I started to get back into it about a year ago to make gifts for weddings and new babies. While I'd love to make everyone quilts, I just don't have that kind of time (or money!), and I think embroideries are nice, personalized gifts that can be equally cherished as heirlooms -- that's my hope at least! Here are a few of those projects.

Emily & Allen's Wedding
Emily is one of my closest friends from college, and she married a great guy last October. Emily, our friend Lauren, and I have proclaimed ourselves "feisty Irish broads," a term that was once used to (lovingly) describe my sassy, smart, and ambitious grandmother. It seemed fitting to make Em and Allen a claddagh, which represents friendship, love, and loyalty -- words to live by! The claddagh itself is a mixture of a few designs I found online, and the banner below is from Sublime Stitching. There are small faux pearls between the words in the banner, and I mounted the embroidery in a shadow box I found at Joann, which ended up giving the finished project just the right amount of polish.

(Time for a secret: This was my second attempt at this embroidery. The first was amazing--you'll have to take my word for it--but the fabric was too thin for the weight of the stitches and ended up tearing when I ironed it. So frustrating! It could not be saved. But my second attempt ended up being finished just in time for their wedding!)


Flowers for Leia
Baby Leia was born last fall to my friends Jim and Sylvia, who just moved to the U.S. from England. (Jim is an old friend of my pal Alex, who studied with me at Lehigh, and I've gotten to know him during my various trips to the UK. I'm very excited to have them nearby!) I wanted to make Leia something bright, cheery, and a little bit girly. I found the bird and flower pattern online, but made a few variations, including adding Leia's name to it. Sylvia said it was Leia's first personalized gift! I really like the color palette for this one. Leia's a little sweetheart, and I'm looking forward to some snuggles from her soon!


Bears for Benjamin
When I moved up to New Hampshire at the age of 6, Melinda was tasked with showing me around the school. We've been friends ever since! I was excited to hear that Melinda and her husband Mike were expecting, and Benjamin arrived in early 2015. I loved these two little bears from September House's baby animals series, and I used some shades of aqua and teal to match Ben's room. I hope I get to meet the little guy one of these days!


Elephants for Evelyn
When I moved back to Pennsylvania at the age of 11, Kate became one of my dearest friends. We hadn't been in touch in a few years, so I was shocked to hear that she had a little girl this summer! I made this embroidery for Evelyn, using the elephants from the same Baby Animals series as the bears above. After I sent this, Kate contacted me about getting together, and I got to meet baby Evy last week! She is beautiful, and it was wonderful to see Kate as a mom. I'm heading down to DC to visit them in October. See -- embroidery can bring people together!


Foxes for Jonathan
Last, but not least, my old friend Shauna welcomed baby #2 a few weeks ago. I made an embroidery of a mama and baby owl for his big brother, Adam, so it was only fair that I made one for him! Shauna and Brian kept the baby's gender a surprise, but I knew their nursery was in orange and green with a woodland theme, so I thought these foxes would be a safe bet. (And adorable, to boot! I really got a lot of mileage out of that Baby Animals pattern set!) I love the little mushrooms on this one.


With that epic post, I'm very close to being caught up! I have just a couple more quilts to write about, and one I'm about to cut fabric for. I've been working on a cute embroidery for myself, as well as some Liberty of London applique projects.

Last week, I reorganized all of my fabric and moved it to a new storage unit. I was a little overwhelmed by how much fabric I've accumulated, so I've decided that at some point, I want to make some charity quilts. If anyone knows of any reliable organizations that accept quilt donations (especially kids' quilts), please let me know!

Monday, September 7, 2015

A Giants (Ew!) Quilt

For reasons I can't fathom, my brother's now-fiancee, Heather, is a Giants fan. As a good future sister-in-law, I made her a Giants quilt for Christmas. I am a Patriots fan, so this broke my heart more than a little bit. It helped to think that I was just making a very pro-America quilt. (I was tempted to embroider a little "Go Pats!" message on the back, but I refrained.)

It's a little bigger than a traditional lap quilt, but smaller than a twin-sized quilt. I used the Giants fabric for standalone blocks and pinwheel blocks, as well as a sizable section on the back. (I really, really didn't want any leftover Giants fabric contaminating my stash!) The blocks are big, about 10 inches, and I used various red, white, and blue patterns to round out the fabric selection. The quilting lines are in a simple grid, so it came together pretty fast once I got into the groove. I think Heather was pleasantly surprised with it on Christmas!


Needless to say, I think this will be the only Giants quilt I make, but I hope she gets a lot of use out of it!

Sunday, August 16, 2015

Liberty Quilt

If you know me, you know I'm a fan of all things British. I've been to the UK seven (?) times now, with another trip planned for the spring. Over the years, I've fallen in love with Liberty of London -- an old department store near Oxford Circus known for its gorgeous line of fabrics. They mainly produce pricey clothing and decor weight fabrics, so I was super excited to hear about the line of (somewhat more) affordable quilting fabrics they were releasing in 2012. I bought the whole line of Bloomsbury fabrics in the blue color story. (Fun fact: The individual patterns are named after members of the illustrious Bloomsbury Group, including one of my very favorite authors,Virginia Woolf!)

I knew I would use them to make myself a quilt for the couch, but it took me a long time to settle on a pattern and with all of the baby quilts I had been making, it took me a year or so to even cut into the Liberty collection. It took another year to to actually put the quilt together. But here it is!


I opted for a disappearing 9-patch pattern, which I had never done before. It was easy in theory, but took a while to execute. First, I sewed together small blocks in a 3x3 arrangment (the "9" in "9-patch") to create large blocks. Then, I sliced up those large blocks into quarters and repositioned the pieces in a haphazard-looking way (the "disappearing" part of the "disappearing 9-patch"). 

The goal was to showcase all of the prints while giving the quilt a traditional patchwork feel. I still did my best to avoid having similar patterns hit one another in the quilt, though. Once I cut into the fabric, I had doubts about how busy the quilt would be, so I threw in some coordinating solids and whites to accent the patterned fabric. 

Since the quilt is somewhere between twin and queen sized, I couldn't afford enough Liberty fabric to finish out the back. I bargain-hunted for some blue patterned fabric in the same color family as the front. 


I also used a London underground print I purchased a while ago on a whim for a nice little homage to my favorite city: 


I quilted diagonally through the main squares, which lately has been my preferred quilting method. I think it provides a nice contrast to the block patterns. (My quilting isn't as wavy as the photo below might have you believe! It was just a windy day, and the quilt kept blowing in the breeze!)


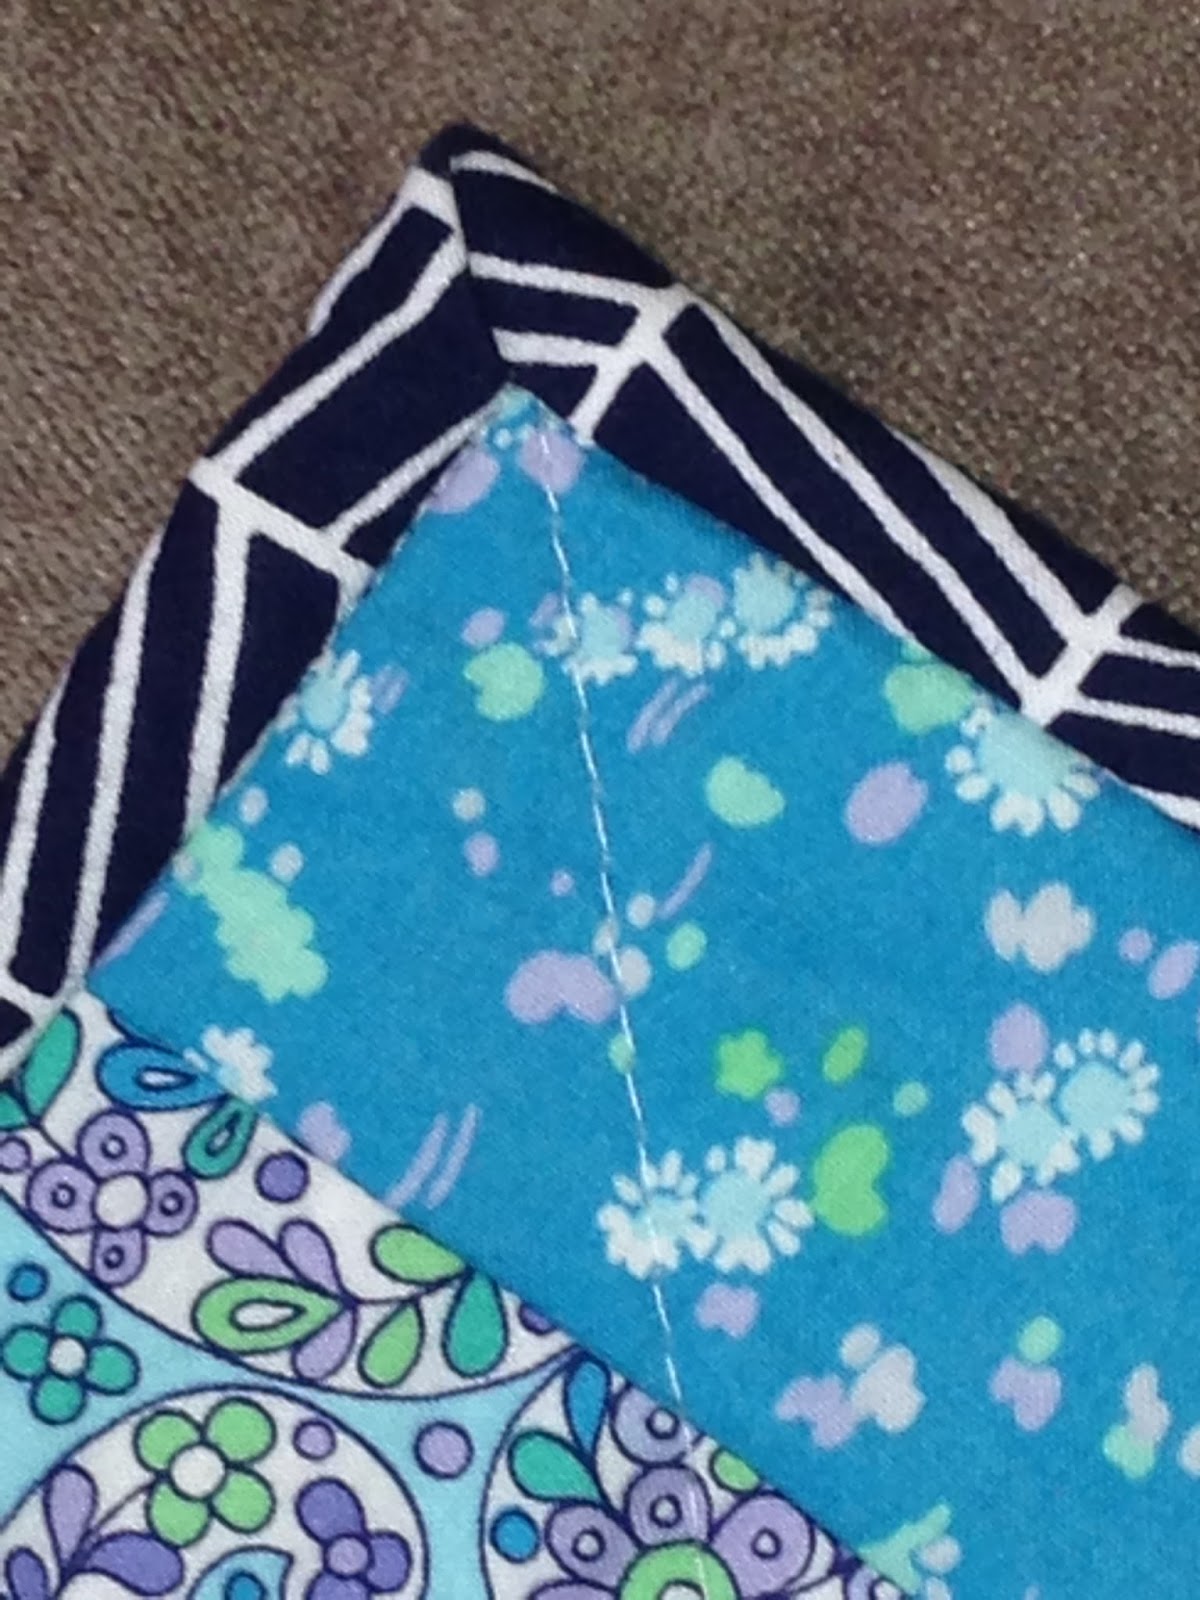
Finally, I bound the quilt in the navy version of my favorite Joel Dewberry herringbone fabric:


This quilt has been at home on my couch for the past year and has proven to be the coziest TV-watching and nap-taking partner. And every time I see it, I think of England!


Thursday, January 1, 2015

Summer Projects

It's funny that I'm posting about my summer projects on New Year's Day, but I've been sick and stuck in the house for most of the week, so I figured now is as good a time as any for a catch-up.

Growing tired of my ever-increasing fabric stash from three years' worth of projects, I decided to make a beach quilt made solely of fabric scraps around Memorial Day. I don't think I could ever spend money on new fabric knowing that it would fall victim to the great outdoors, but I knew I wouldn't be heartbroken if a scrappy quilt got dirty. The only fabric I purchased was an Ikea sheet, which I used for the middle layer instead of wool/cotton batting, and 108" broadcloth fabric for the backing, since I didn't want to piece together a quilt backing that large.

I ended up with 600-some blocks for the front. I think the squares are 3-4 inches... can't remember! It took ages to piece together -- about a month of working on it whenever I had a spare moment. And, because I am type-A, I had to make sure no two patterns or colors were touching. I made light-dark fabric pairs, then built rows from those.


It wasn't a perfect process, but it came out pretty well, I think. It finished up at a queen size, and the thin middle layer makes it less bulky than other quilts -- perfect for the beach or a picnic! I quilted diagonally, and the binding is a bright purple that failed to make the cut for my brother's LSU quilt.

Here's its beach debut in Labadee, Haiti:


And here it is in the somewhat less exotic locale of Rehoboth, Delaware:


The Rehoboth Beach trip was with my friends Drea and Lynn, and they both had fun picking out the fabrics that were in their quilts. I'm happy I made a good dent in my stash (to make room for more fabric!) and was able to make something useful.

I bought this adorable crab fabric on sale in the spring and knew I wanted to make a beach bag out of it. I searched high and low for a good pattern, but nothing seemed like it would work for me. I wanted it to be large enough to hold the above quilt as well as some towels. I wanted to make the handles out of webbing for increased durability, and it would be great if it could have a pocket or two for things like my wallet, phone, and Nook. I ended up just using what I've learned on my sewing adventures to come up with a pattern myself. And you know what? I'm really glad I did!

I used some leftover quilt batting to make the outside panels -- which are about 22 x 28", I believe -- and give it some shape, quilting straight lines a few inches apart in navy blue. I bought about 5 yards of red webbing. I measured the drop I wanted and cut accordingly. Sewing on the handles was easier than I thought it would be, and I stitched Xs in the corners for reinforcement while allowing for a big pocket on the outside. Then I stitched the panels together facing one another before turning the bag right-side-out, using 1/2 inch seam allowances. (I read that you should use larger seam allowances for bags... can't remember where, but it stuck!) I created a lining out of the crabby fabric and made two small pockets. I slipped the lining in the outside of the bag. Then, I used pre-made binding to finish off the top. It took maybe 4 hours from start to finish.


The only thing I would do differently in the future is to make the binding myself. The store-bought binding was flimsy and didn't play well with all of the fabric layers. But it worked in the end. I've gotten a lot of compliments on the bag as it came out and about with me this summer, and I feel like I've leveled up in making bags!

Up next: Liberty Quilt (finally!), Giants Quilt, and some embroidery projects!


Monday, September 8, 2014

Auntie Kym

It's hard to believe it's been the better part of a year since I last posted! I've sewn a few projects, though I took a long break after a poorly thought-out decision to make a gigantic scrappy beach quilt before I went on vacation in addition to sewing a beach bag from scratch. I didn't give myself enough time to enjoy the process of making either one, but I'm pleased with the way they came out. I just needed a breather after that!

But rewinding a few months to the spring, I made a quilt for my oldest friend Becky's new arrival, Michelle Elaine. (She takes her middle name from Becky's mom, who got me hooked on embroidery all those years ago!) I wanted to make something a bit girly, so it would be distinct from her brother Simon's quilt, but I'm not a big fan of pink. So, I based the color scheme around Patty Sloniger's Les Amis line and went with peach, cream, and green.


I tried my hand at pinwheel blocks for the first time, and I love the way they came out! I found some great tricks online for making a few pieces at once, which definitely came in handy. Since the prints in this line are so cute -- I love the woodland themes that are popular right now! -- I made big blocks for the front of the quilt.

The back is a 108" width fabric from Connecting Threads. It struck me as being too bright at first, but I grew to like the pop of color. I quilted in a grid pattern, roughly following the block pattern. And of course, I embroidered a message to Michelle.


I was lucky enough to get to hand deliver Michelle her quilt in May when I flew out to California for a long overdue visit with Becky and her family. It was wonderful! Becky's a great mom, and her kids are two of the sweetest, brightest kids I've ever met.

Simon, who is now two, calls the quilt I made him "Auntie Kym." His parents originally explained to him that his Auntie Kym had made the quilt for him, but in toddler logic, that meant the quilt must be called "Auntie Kym." He always asks for Auntie Kym when he goes to sleep (which caused some confusion when I was visiting!), but it's so nice to know that he loves his quilt. Sometimes you wonder if the quilts you've spent hours and hours working on get shoved into the back of the closet, or forgotten after the initial appeal wears off. I'm so glad that mine are being put to good use!

When I gave Michelle her quilt, Simon had to bring his out, too. :)


It's an Auntie Kym party!


I love those kids, but at the rate they are growing, it won't be long before they need bigger quilts!


Tuesday, February 11, 2014

My New Sewing Machine

My Brother LX-2500 has served me well over the past 2 1/2 years as I dipped my toe into the world of sewing and quilting, but the more I worked on it, the more I started to notice its flaws. The thread tension would sometimes change for no good reason, leaving me with trails of loose or tight stitches I would have to pull out and redo. There's not a lot of space to push a large quilt through. The presser foot stopped lifting as high as it should, so I'd have to hold it in place when I needed it in the "up" position. And finally, it was very, very loud. 

As a beginner's machine, I could not recommend it highly enough. It has everything you need without any frills, and for occasional sewing or mending, it would be perfect. But this past fall, I knew I wanted to step up to a better machine. So, come Christmas, I knew what I would be asking for.

I did quite a bit of research. All of the sewing bloggers I read use Janomes, Berninas, or Jukis, it seems. But those are expensive (in the $1000-2000 range), and they also have a different layout than what I'm used to. I don't sew every day, and sometimes I even let a few weeks go by without sewing, so spending more than a few hundred dollars on a machine seemed excessive -- even if it would be a gift! 

Since I had a good experience with Brother, I set my sights on one of their computerized models, the CS6000i. It has the same layout as my old machine, but much more space to work with. There's even a snap-on table that extends your workspace. The digital display is easy to use and there are 60-some stitches. (I've only tried a handful, so far.) The automatic needle-threader was a selling point for me. It also came with a cover and several feet. Best of all, I found it on sale on Amazon in the range of $150, so I keep reminding my dad that I saved him a bunch money on my Christmas gift.


(A bonus peek at my Liberty quilt in progress!)
So far, it's been great. The tension is much more consistent, and so is the stitch length. It runs the fabric through much more smoothly than it's predecessor. And it's quiet! 

My first project was a pillow for my college friend Ryan's new son, Arthur. I used some Michael Miller fabric I had on hand and I machine-appliqued an "A" on the front. It came together in just a couple of hours. I hope the little man likes it!
(Ignore the rogue thread...)


Then, I made an apron for myself with some of the Joel Dewberry's Bungalow fabric my mom got me for Christmas. I used an apron of my dad's as a template, then I pretty much winged it! I mentally split the apron into a top and bottom, then I arranged the fat quarters to fit the separate parts. I lined the top piece and the bottom piece to give it some weight. For each piece, I pinned reverse sides of the outer fabric and lining fabric together, stitched around three sides (leaving the bottom of the top and the top of the bottom open), then flipped the piece right-side out. As I attached the lining for the top, I also attached the neck strap (whose fabric is from the very first quilt I made!). I added a pocket to the bottom. Then I connected everything with the middle band, and topstitched around each of the fabric pieces to give it more of a finished look. 

I decided to extend the ties at the last minute and had run out of that fabric, so I improvised. I wasn't 100% pleased with the top, so I added the extra strip of fabric, which I think brings it all together. When you look at the back, you can see how piecemeal it is, but I figure it doesn't really matter, since it's just for me.


It's big -- the sides wrap around my back, so they're almost touching. However, I'm a messy cook, so that's probably a good thing. I'm very happy with it. I like how crazy it looks with so may fabrics and colors. Maybe it will make me want to cook more often! 

Next up: Laundry Bags, Take 2